
Installing Kanboard through Dokploy
I’ve been looking for a simple yet complete way to create and share Kanban boards.
I’m used to tools like Jira, GitLab, and OpenProject. These are all great, but they tend to be either too expensive, incomplete, or too resource-hungry.
After some research, I came across Kanboard. At first, it looked a bit "plain," but the source code turned out to be well maintained, fully open source (no paid tiers), and built with Docker, PHP, and even some Symfony libraries.
Status#
Looking at the Kanboard GitHub, the first commit dates back more than 12 years! And as of writing, the latest release, 1.2.48, was published just two weeks ago.
It’s great to see that Kanboard remains actively maintained and uses modern libraries and Docker images.
On top of that, there are many plugins. Even older ones are still mostly compatible with the latest Kanboard version, adding plenty of useful features.
Requirements#
We’ll deploy Kanboard through Dokploy, which will handle pulling the image from the Kanboard Docker registry.
You can see how I set up Dokploy in my post about moving to Dokploy
Database#
If no specific configuration is provided, Kanboard defaults to using sqlite as its database. While it works, it often leads to file lock issues and makes backups a bit awkward. So we’ll configure a real database — MySQL, MariaDB, or PostgreSQL. Since I already use PostgreSQL for several other projects, I’ll reuse that instance for Kanboard.
I have a database project in my Dokploy setup, running PostgreSQL version 18 (the latest at the time of writing). In Dokploy, create a new Project, maybe called infrastructure, and add a new database service:
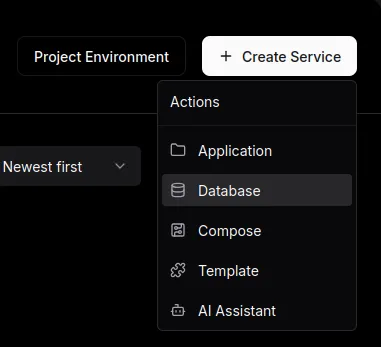
Call it psql18-db and set the version to postgres:18. This will create a default setup for our database.
By default, Dokploy mounts it to a volume. However, with PostgreSQL 18, it needs to be mounted to a slightly different internal path. Under Advanced > Volumes, you’ll see the mount path /var/lib/postgresql/data. Change it to /var/lib/postgresql.
Once that’s done, go back to the General tab and click Deploy to start the database. When it’s up and running, open a terminal inside the container to create a new schema.
If you didn’t change the username during setup, you can connect using:
psql -UpostgresThen create a new schema:
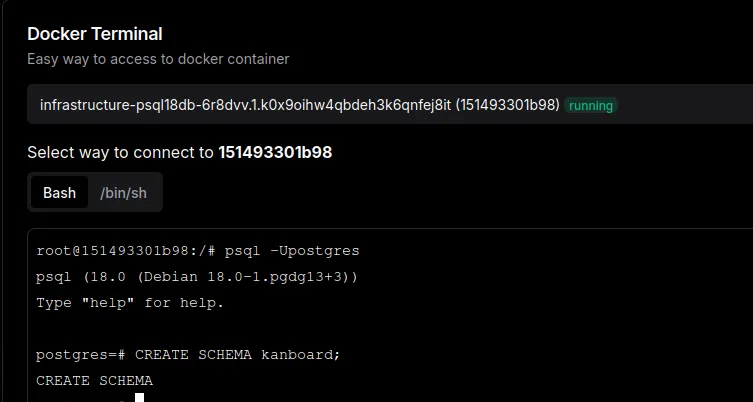
Once that’s done, copy the internal connection URL — you’ll need it later.

It should look something like this:
postgresql://postgres:YOUR_PASSWORD@infrastructure-psql18db-6r8dvv:5432/postgresThe database is now ready and accessible for our Kanboard project (or any other project on the same VPS). Depending on your setup, you might want to create a dedicated user and schema per project.
Setting Up Kanboard#
With the database ready, let’s deploy Kanboard. Create a new project on the same VPS as your database.
Add a new application to this project, and under Docker Image, set:
ghcr.io/kanboard/kanboardand Registry URL to:
ghcr.io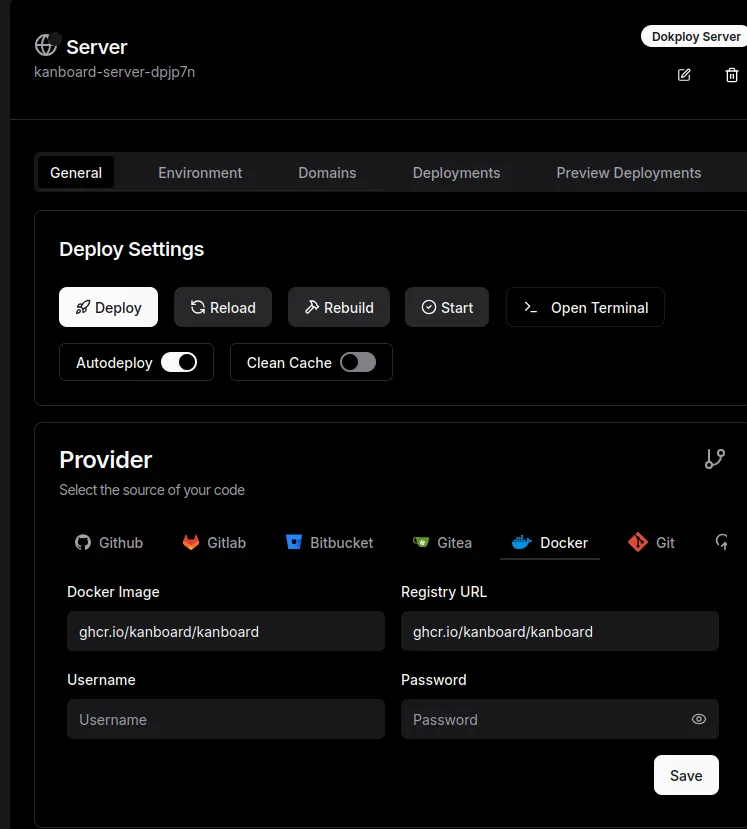
Now click Deploy. You can assign a random domain and test it by clicking the dice icon and setting it to port 80. When you open the link, you should see the Kanboard login page. The default credentials are admin:admin.
However, we’re not yet connected to our PostgreSQL database — it’s still using a temporary SQLite file that resets on each deployment.
To fix that, go to the Environment tab of your Kanboard application in Dokploy.
Here, we’ll define a few environment variables. Remember the connection string from earlier? We’ll break it down into components:
DB_DRIVER=postgres
DB_USERNAME=postgres
DB_PASSWORD=thepassfromearlieron
DB_HOSTNAME=theautogeneratedhostname
DB_NAME=kanboard
After saving these variables, click Deploy again. Kanboard will now connect to your PostgreSQL database.
Using Kanboard#
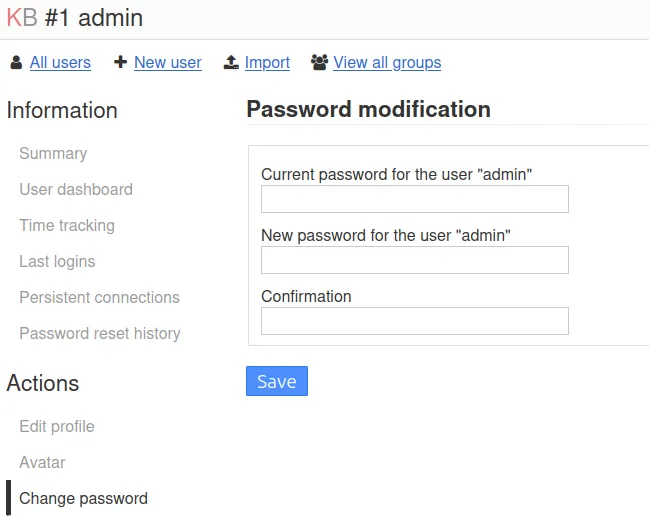
The first thing you should do is change the admin password. Click your avatar in the top-right corner, select My profile, and update your password.
Conclusion#
That is Kanboard running on Dokploy with its own PostgreSQL schema. From here you can look at managing users, SMTP for notifications or OAuth, and at the plugins for time tracking, Gantt charts or automation.
If you want a post about how I use Kanboard day to day, let me know in the comments.
Comments
There are no comments yet. Be the first to write one.
Write a comment